
Horizontal flow reedbed
All the water from baths, showers and sinks comes through our reed bed, which filters and cleans the water, before it passes to our pond. This means it is important to avoid putting any chemicals down the sink, and why we provide ecologically friendly cleaning products.
Building the reedbed
This week we undertook the building of a ‘proper’ horizontal flow reedbed. Our existing little ones were a hastily built, stopgap measure that we installed when we got here, and it was time to do things correctly. A horizontal flow reedbed can cope with our greywater, which has been passed through a basic straw filter to remove large food particles. We used washed stone and sand -2 tonne of stone, and about 3/4 tonne of sand. The reedbed is approximately 30cms deep, comprising mainly stone with a 50mm layer of sand at the top, and is planted with reedmace that were growing in wet spots around the site. Here is the system (illustration by Daniel)

The build took us two and a half days, with a lot of time being spent on ensuring that the levels between the inlet and outlet were correct, so that the reedbed will always remain full of water to just below the surface.
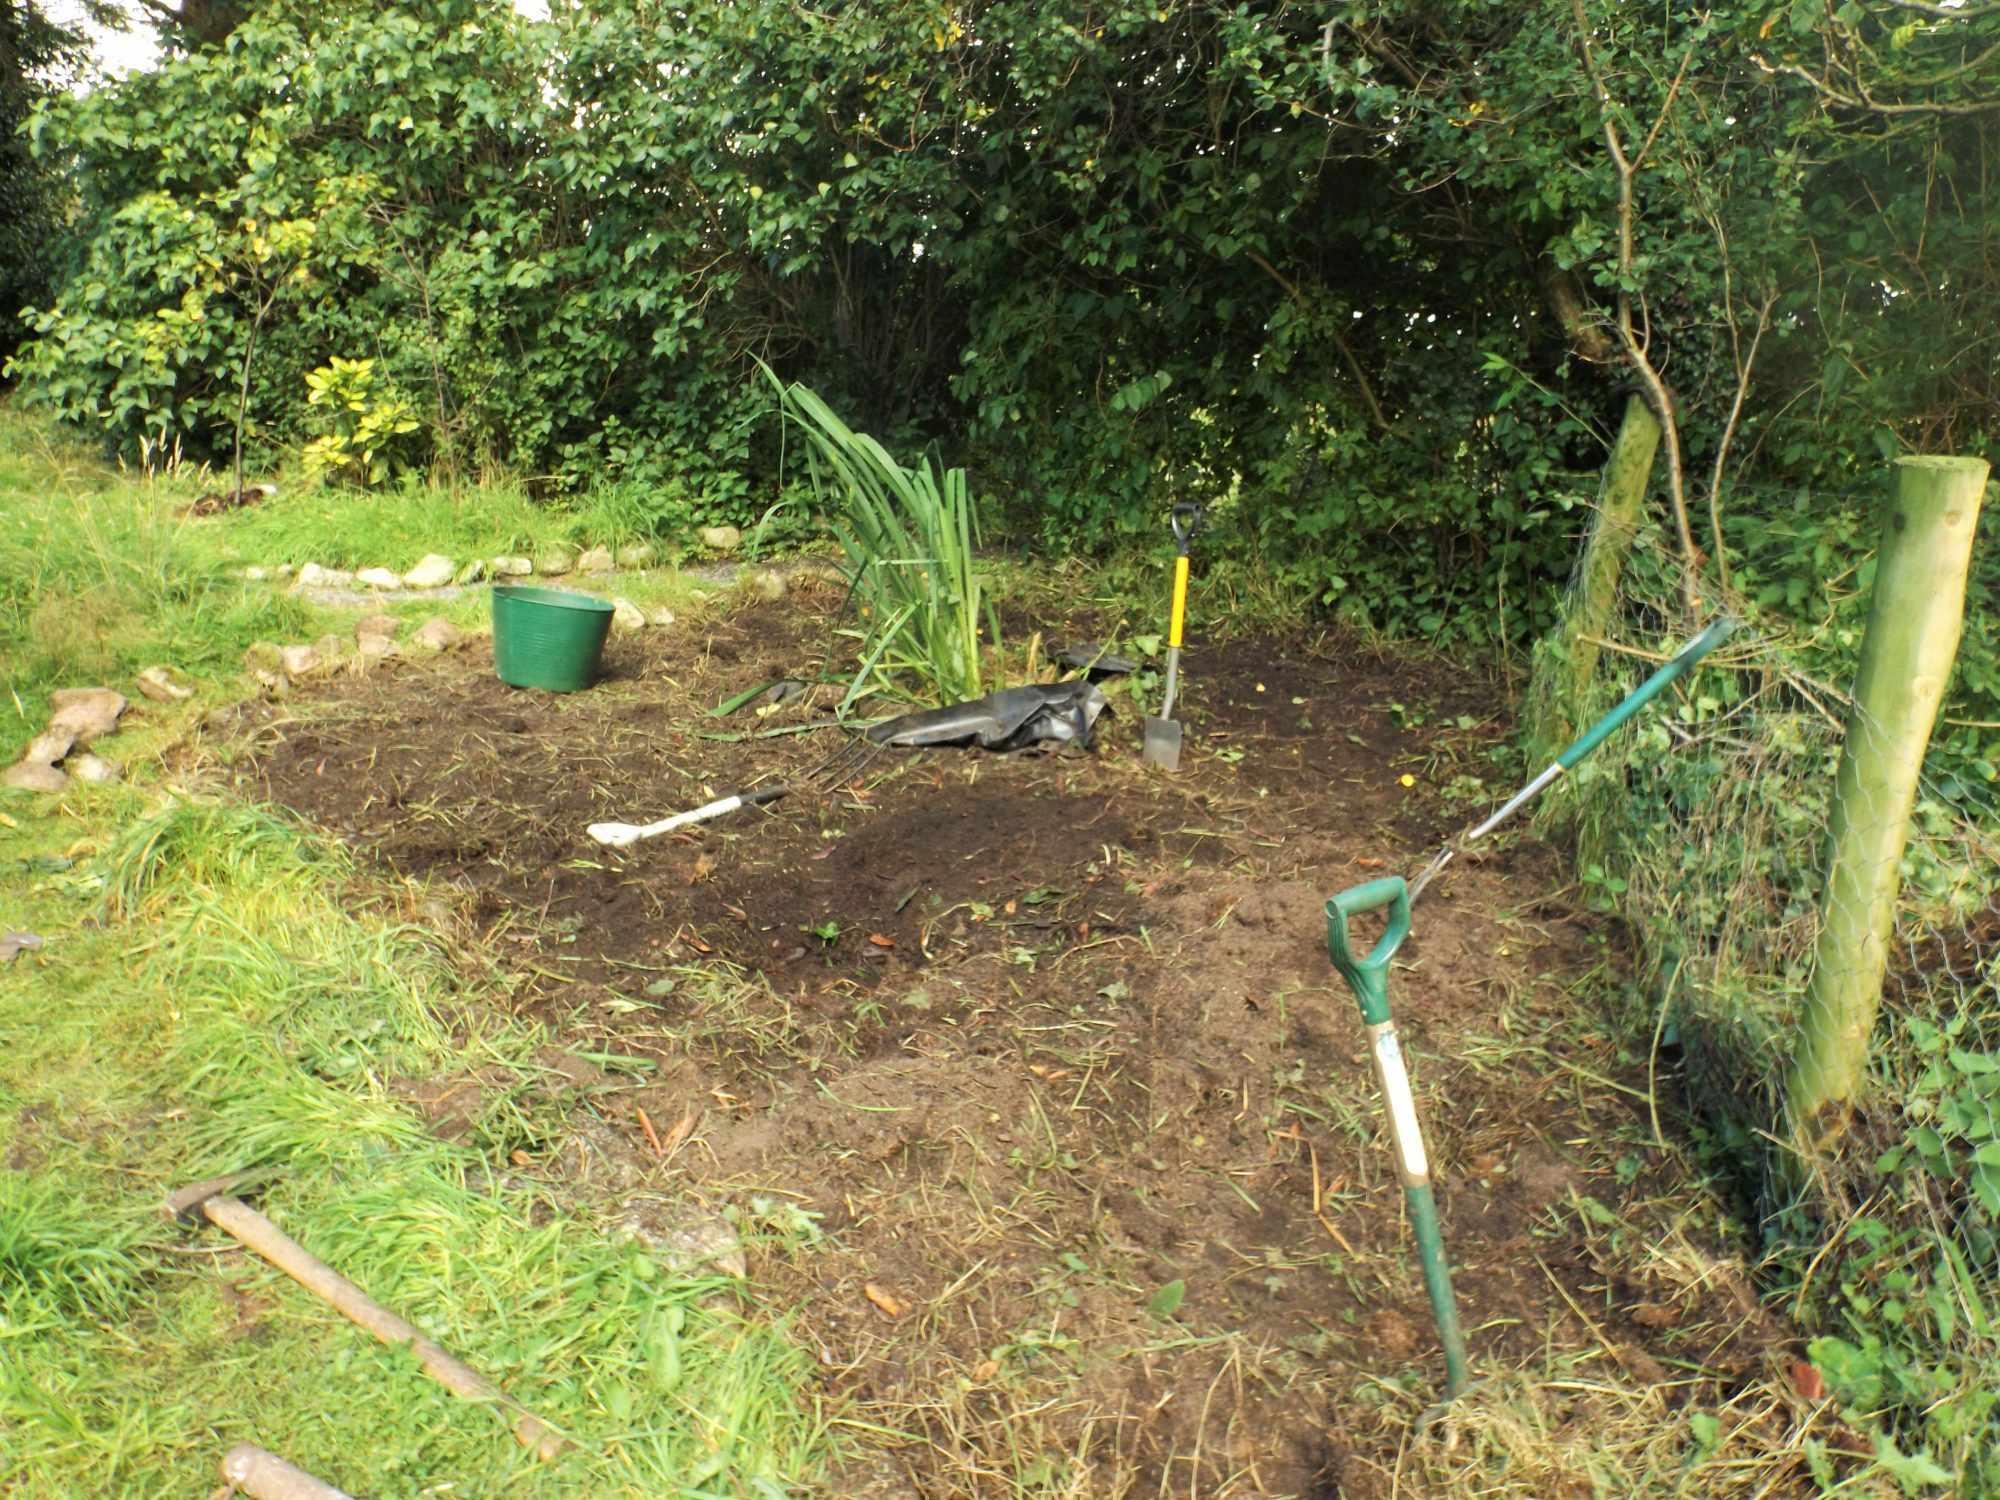
The area once the existing undergrowth was cleared

The old little (non-functioning) vertical reedbed and pipework are removed.

The area between the new reedbed and the big pond being cleared by Daniel

A crucial bit – the soil is cleared to form the banks of the reedbed, and the bottom levelled to give a gentle 1:100 slope. Just off horizontal, basically.

A test with some water to ensure that it does indeed head in the right direction before we put the proper liner in. It is crucial to get the slope right – you don’t want areas where the water settles and won’t flow through the reedbed and away.

We put these pieces of 2″ pipe under the plastic layer to form baffles that would direct water at the bottom of the reedbed around, thus slowing it down.

We used four layers of silage sheet in the absence of a ‘real’ pond liner.

This was protected by used tonne builder’s bags to protect the plastic. Here Daniel is shovelling gravel onto them to keep them in place before the area is filled with gravel. We used nearly 2 tonne.

The outlet is created by making a hole through the liner(s), taping the liner around the outlet pipe, and then using a clamp (one of those wall clamps used to hold soil pipe onto the side of a house), tightened to form a seal.

The second layer of sealing is clay – placed both sides of the seal and worked in around the pipe.

A couple of tiles and stones protect the outlet from blockage before being buried in stones

Now the reedbed is filled with stones to just below the level of the inlet, and Felix and Lyra test this by filling with water, and adjusting the stones level until it is even across the surface of the reedbed.

The outlet effectively sets the level inside the reedbed, as more pipe can be added to raise the level before it overflows to the pond.

Here the water level has come up and we are moving the gravel around to get a true level.

And here is the completed outlet after some adjustments. Once the water in the reedbed reaches the correct level (ie just below the surface), it can overflow out to the pond, but the reedbed always remains full of water. The opening at the top allows for water sampling to be carried out.

A layer of sand is added, and the planting of the reeds begins. We are using reedmace as it grows nearby, and is happy in our microclimate. Be sure to plant the reeds so that they are in the wet layer below the surface.

Planting almost complete, and we are edging the reedbed with stones to conceal the plastic liner.

This fitting causes the inlet water to spread out, reducing erosion in front of the pipe, and ensuring that water spreads out over the surface of the reedbed.

Completed reedbed, after connection, and with the pipework mostly buried.
I am very interested in this as we are now living off grid and need to install a reed bed for our grey water. I love your simple way of doing it helped by a plan I can follow! I assume the grease trap (straw bail) is in a container and the water being filtered through it, how do you remove the very wet bail when it needs replacing?
Hi Susan. We’ve tried various things for the grease trap and I think the best bet is something relatively small (like an old belfast sink) filled with straw that is changed pretty regularly. Maybe weekly or fortnightly, but we always forget. Having a simple bottle trap along the way settles out a lot of stuff too, though scooping it out isn’t a huge amount of fun. Having both seems to work pretty well. Then avoiding getting food (and grease) down the sink will make it all less likely to fur up too.
I wouldn’t use a whole straw bale – it will be enormously heavy, smelly and generally awful by the time you come to change it. Little and often is the way to go.
Our greywater has been the hardest bit to get right – if you are building it now, I would do several and link them, and make them bigger than ours. No harm in that if you have the space and much easier than re-doing ones that are too small.
Hope thats helpful
cheers
Steve
Is there a sizing formula for instance I am solo living off grid only producing very max 20 liter of grey water a day, and that only on my weekly shower day. Mostly it’s between 10 – 15 liters. So maybe quarter of that size? Kitchen waste water is put through a sieve to catch the big bits and then sent to a simple bucket grease trap. Works OK but the result is still slightly greasy and doesn’t of course get rid of the micro-nutrients from the kitchen waste water. Presently putting into mulched swale but would prefer to make a small pond from it and draw from it for some light garden watering.
hi there, found your reed bed construction pictures really interesting. We’ve had on for about 15 years… brilliant! We now need to install another one but can’t find any info on the modern requirements for the discharge (exit) of the clean water from the reed bed. We had thought to simply dig a large deep pit; fill it with stone / gravel with the outlet pipe inserted in this. Is this what you did? Our building control dept. hasn’t a clue what is acceptable!!!!